
Printing
Print Passport Photo at Home: Settings, Paper, and Size Check
Print a 2×2 passport photo at home on photo paper. Printer settings, size verification, and when home printing beats the pharmacy.
Updated May 28, 2026
Get your compliant passport photo now
Upload any photo from your phone. We format the background, crop, and sizing to US specs — digital 2×2 file plus 4×6 print sheet in under 60 seconds.
Upload Your Photo →When home printing makes sense
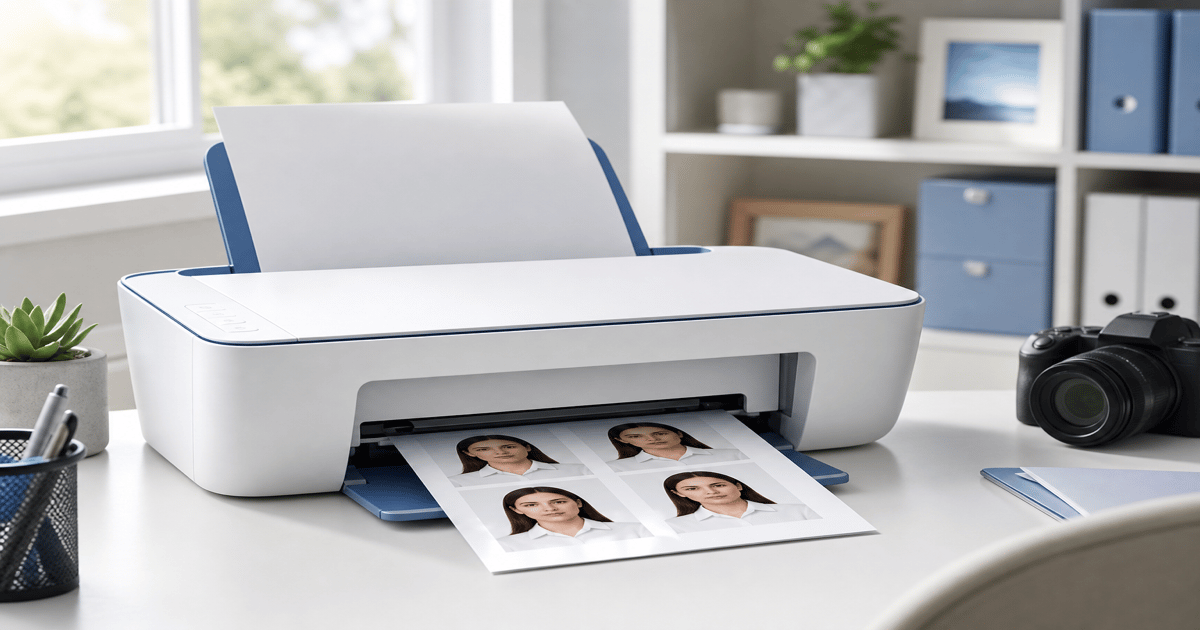
Home printing works when you already have a correctly formatted digital file or 4×6 print sheet and need physical 2×2 photos today — no pharmacy trip, no appointment, no waiting for pickup.
You need a photo-capable inkjet or dye-sublimation printer and glossy or matte photo paper. Laser printers on office paper produce prints that acceptance facilities routinely reject for poor color and texture.
GetPassPhoto provides a 4×6 print sheet sized at 300 DPI. Your job is to print it at actual size with color accuracy — not to crop, resize, or reformat.
Printer settings that matter
Select 4×6 inch paper size in your printer dialog. Set scaling to 100% — never "fit to page" or "shrink to fit," which alter the dimensions of each 2×2 photo on the sheet.
Choose the highest quality photo setting your printer offers. Disable borderless printing if it causes the driver to crop the image edges — a small white border on the 4×6 sheet is acceptable; cropped heads are not.
Use the photo paper type setting that matches your paper (glossy or matte). Wrong paper type settings produce color casts — skin tones look too red or too yellow, and white backgrounds look gray.
Verifying the 2×2 size after printing
Cut one photo from the sheet and measure it with a ruler. Each side must be exactly 2 inches (51 mm). If it measures 1⅞ or 2⅛ inches, your printer scaled the image incorrectly — reprint at 100% scaling.
Compare the print to the digital preview on your screen. The background should be white, not gray or cream. Shadows on the face that were not in the digital file indicate a printer color calibration issue.
If home prints consistently fail size checks, upload the same 4×6 sheet to a pharmacy online order instead. See our guide on printing passport photos online for pharmacy upload instructions.
Paper and ink considerations
Use name-brand photo paper (HP, Canon, Epson) matched to your printer manufacturer. Third-party paper works but may produce inconsistent color.
Check ink levels before printing. Low cyan or magenta cartridges shift skin tones. A photo that looks acceptable on screen but prints with a green or orange cast will be rejected. Replace cartridges that are more than six months old even if levels look adequate — dried ink causes subtle color drift that shows up on white backgrounds first.
Let the print dry for 10–15 minutes before cutting. Wet ink smudges easily, and smudged photos are rejected on sight at acceptance facilities.
Home print vs. pharmacy print: quality comparison
Commercial photo lab printers (Walgreens, CVS) use dye-sublimation or high-end inkjet systems calibrated for consistent color. Home printers vary widely in quality.
If your home printer produces accurate color and correct sizing, the acceptance facility will treat it the same as a pharmacy print. The photo content matters, not where it was printed.
Start with a formatted file from GetPassPhoto rather than attempting to size and crop yourself. Our 100% acceptance guarantee applies regardless of whether you print at home or at a pharmacy.
Inkjet vs. dye-sublimation: which home printers pass inspection
Consumer inkjet printers from HP, Canon, and Epson can produce passport-quality 2×2 prints when fed the correct 4×6 photo paper and a pre-formatted source file. Look for models marketed as "photo printers" with dedicated color cartridges — not all-in-one office printers optimized for text documents. Six-color or more ink systems reproduce skin tones more accurately than basic four-cartridge setups. Entry-level photo printers in the $100–$200 range generally outperform laser multifunction devices for this specific task.
Dye-sublimation printers like Canon Selphy and some portable HP Sprocket models excel at consistent color but require proprietary paper packs sized for their trays. If your dye-sub unit accepts 4×6 media, the GetPassPhoto print sheet works the same way as on inkjet — load the paper, print at 100% scale, and verify dimensions with a ruler. Dye-sub output rarely shows banding or grain, which makes it a strong choice for last-minute DS-11 submissions.
Avoid laser printers entirely for passport photos. Toner on plain paper produces flat, grainy images with inaccurate skin tones and backgrounds that read as gray under acceptance facility lighting. The State Department expects photo-quality paper with continuous-tone color reproduction. If your only home device is a laser printer, upload the GetPassPhoto 4×6 sheet to Walgreens or CVS for one-hour pickup instead — see our guide on printing passport photos online. Laser output is fine for documents; it is not fine for biometric photo submission.
Mac and Windows print dialog settings that preserve 2×2 size
On macOS, open the 4×6 JPEG in Preview, select File → Print, and set Paper Size to 4×6 or the closest match your driver offers. Set Scale to 100% — the slider must read "100%" not "Scale to Fit." Under Print Settings, choose Photo Paper for media type and Best or High for quality. If your driver shows "Borderless," turn it off unless you have confirmed borderless mode does not crop the image edges on test prints. Save your working settings as a preset if you print passport sheets for multiple family members in one session.
On Windows, right-click the file, choose Print, and select your photo-capable printer. Click Preferences or More Settings, set paper size to 4×6, and locate scaling options — select "Actual Size," "100%," or "No Scaling." Disable "Fit picture to frame" in the Windows Photos app; that option shrinks the image and produces 2×2 cutouts smaller than spec. Print from the manufacturer's utility (HP Smart, Canon PRINT, Epson Print Layout) when the generic Windows dialog lacks fine-grained paper controls. Manufacturer utilities expose paper type and quality settings that generic dialogs hide.
Run one test print on plain paper before using photo stock if you are unsure about scaling. Hold the test sheet against the screen and compare the face size in the preview to the printed output. If the printed face is noticeably smaller or larger than on screen, adjust scaling before committing glossy paper. GetPassPhoto files are dimensionally correct at 300 DPI — scaling errors come from the print driver, not the source JPEG. Plain-paper tests cost pennies and prevent wasted photo stock.
Cutting, handling, and attaching prints to DS-11 without damage
Use sharp scissors or a paper trimmer with a guide rail for clean 2×2 edges. Ragged cuts and visible white fringe from dull blades draw examiner attention even when dimensions are correct. Cut one photo at a time from the 4×6 sheet, following the faint guide lines in the GetPassPhoto layout. Stack unused copies flat — do not fold or roll them — so spares stay pristine for visa or state ID applications. A trimmer with a locked 2-inch guide produces more consistent results than freehand scissors for multiple family members on one sheet.
Attach the selected 2×2 print to the DS-11 application with a single staple in the upper corner if the form instructions specify stapling, or leave it loose if your acceptance facility prefers unstapled photos. Never use tape, glue, or paper clips — adhesive residue and clip indentations cause rejections. Handle the photo by the edges only after the ink has dried for at least fifteen minutes; fingerprint smudges on the face are grounds for refusal.
Bring two identical prints to your acceptance facility appointment even if the form asks for one. Clerks occasionally reject a print damaged during handling and ask for a replacement on the spot. The GetPassPhoto 4×6 sheet gives you six identical copies from a single order, so a damaged spare costs nothing extra. If an acceptance facility rejects the photo content — not the print quality — forward the rejection notice to GetPassPhoto for a full refund under our 100% acceptance guarantee.
Troubleshooting banding, streaks, and color casts on home prints
Horizontal banding across skin tones usually means a clogged inkjet printhead or a nearly empty cartridge. Run the printer's built-in head cleaning cycle from the maintenance menu, then print a nozzle check pattern before wasting photo paper. If cyan or magenta nozzles show gaps, replace the affected cartridge even if the ink level indicator reads above zero — partial clogs produce visible streaks that acceptance clerks treat as quality defects. Banding that appears only in mid-tone areas often clears after two consecutive cleaning cycles.
A white background that prints as cream, gray, or light blue often traces to wrong paper type selection in the driver, not to the source file. Reopen the print dialog, set media type to match your paper stock exactly, and disable any "vivid" or "saturation boost" modes that shift neutrals. Compare a test strip against the GetPassPhoto digital preview — the background should match paper white, not take on a color cast.
If banding and color issues persist after maintenance and setting corrections, the practical fix is pharmacy printing from the same 4×6 file rather than repeated home attempts on a failing printer. GetPassPhoto's 100% acceptance guarantee covers photo content compliance, not hardware malfunctions — but a correctly formatted file prints cleanly on any calibrated lab printer. Upload the sheet to Walgreens or CVS for pickup and reserve home printing for devices you have verified with a ruler and a test sheet first. A bad printer does not mean a bad source file.
Frequently asked questions
Can I print a passport photo on regular paper?
No. Acceptance facilities require photo-quality paper — glossy or matte photo stock. Regular copy paper is rejected.
What size paper do I need to print passport photos at home?
Print the GetPassPhoto 4×6 sheet on 4×6 photo paper. Each of the six photos on the sheet will measure 2×2 inches when printed at 100% scale.
Why does my home-printed passport photo look too dark?
Printer color profiles often darken images. Adjust brightness in the print dialog or use your printer's photo enhancement setting. Compare against the digital file on a calibrated screen.
Is a home-printed passport photo accepted for DS-11?
Yes, if it meets all specifications — 2×2 inches, photo paper, correct head size, white background, and accurate color. The printing location does not matter; the specs do.
GetPassPhoto services
Related guides
- Print Passport Photo Online: Digital File to 2×2 Prints
Print passport photos online from a digital file. 4×6 print sheets for Walgreens, CVS, Walmart, or home printing at correct 2×2 size.
- Make a Photo 2×2: Passport Size Crop, Pixels, and Print Guide
Make any photo 2×2 inches for U.S. passport use. Correct aspect ratio, 600×600 pixels, head size rules, and print instructions.
- How to Make a Photo Passport Size: 2×2 Inches and 600×600 Pixels
Make any photo passport size — 2×2 inches, 600×600 pixels, correct head height. Specs for print and digital submission.
Get your compliant passport photo now
Upload any photo from your phone. We format the background, crop, and sizing to US specs — digital 2×2 file plus 4×6 print sheet in under 60 seconds.
Upload Your Photo →